
TL;DR
To make your closet setup quieter and sound better, focus on strategic placement, acoustic treatment, and ventilation. Moving noise sources away is the most effective fix, with absorption and barriers playing supporting roles.
Ever tried recording or working in a tiny closet? It’s a mixed bag. The small space naturally muffles some noise, but reflections, echoes, and low frequencies can turn your setup into a muddy mess.
This guide breaks down how to tame that chaos—whether you’re building a mini studio or just trying to keep your AI rig quiet. You’ll learn why moving the rig is the smartest move, how to treat reflections, and what it takes to keep your closet from turning into a heat trap. No fluff, just real, actionable advice.
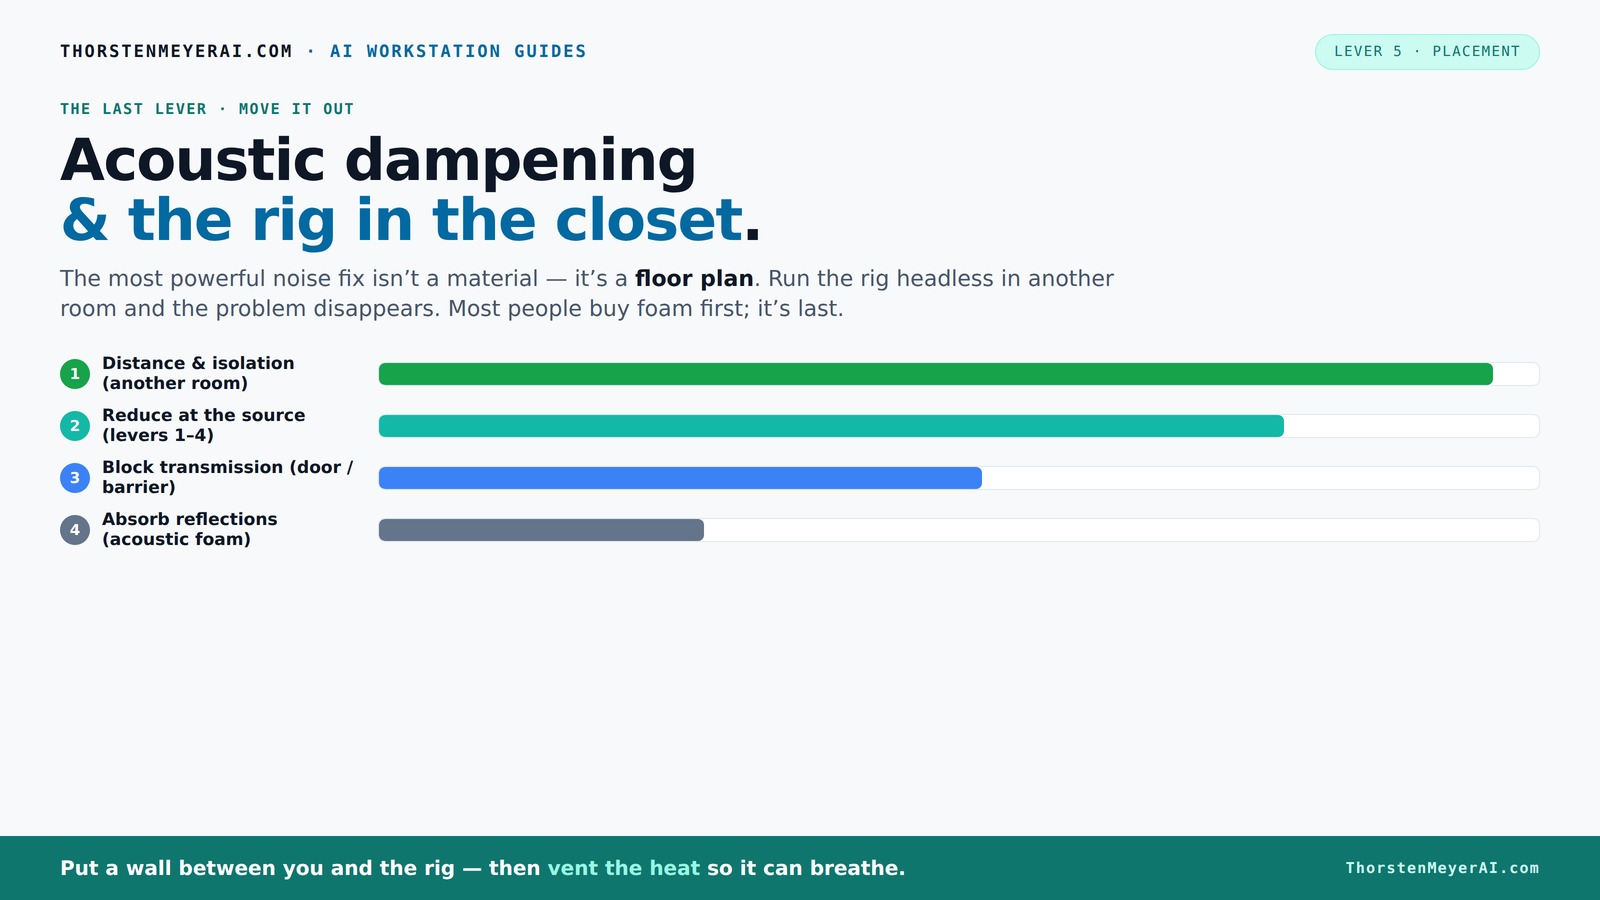
Acoustic dampening
& the rig in the closet.
The most powerful noise fix isn’t a material — it’s a floor plan. A rig you can’t hear because it’s in another room beats any amount of foam. Tap the approaches in Part 1 to see what actually works.
(another room)
(levers 1–4)
(door / barrier)
(acoustic foam)
Contain the noise, not the heat
Key Takeaways
- Moving your rig to another room is the most effective way to quiet it—distance cuts noise dramatically.
- Proper ventilation is crucial when placing a high-heat rig in a closet—active airflow prevents overheating and throttling.
- Target reflection points like side walls and behind the mic with acoustic panels to reduce echo and improve clarity.
- Use a combination of absorption, barriers, and bass traps for balanced sound treatment in small spaces.
- Simple decoupling with rubber pads and isolation mounts can significantly cut low-frequency vibrations and structure-borne noise.

Focusound 52 Pack Acoustic Foam Panels 1" x 12" x 12" Sound Proof Foam Panles Soundproofing Noise Cancelling Wedge Panels for Home Office Recoding Studio with 300PCS Double-Side Adhesive
Soundproofing - Acoustic foam panels triangular grooves structure for better noise absorption, helps to reduce and absorb unwanted...
As an affiliate, we earn on qualifying purchases.
As an affiliate, we earn on qualifying purchases.
Why Moving the Rig Beats Adding Foam — The #1 Sound Fix
The best way to silence your noisy rig? Put it somewhere else. Distance is the single most effective tool against noise. When you increase the physical distance between your noise source and your listening area, the sound energy diminishes significantly due to the inverse square law — meaning that doubling the distance cuts the perceived loudness roughly in half. This isn’t just about comfort; it’s about fundamentally reducing the amount of sound that reaches your ears.
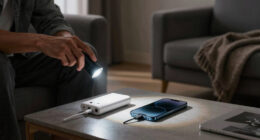
For example, many AI setups are accessed remotely. You SSH into a server in a closet or basement, so the noise isn’t a problem at all. The rig roars, but you never hear it. This simple move saves money and effort, and it’s often the most practical solution. It also avoids the tradeoffs involved with dampening materials, which can sometimes muffle your sound or create unwanted acoustics.
Research shows that increasing distance reduces perceived loudness by up to 50%, making it a game-changer here. The implications are clear: before investing in absorption or barriers, consider whether relocating your equipment can achieve the noise reduction you need with minimal effort and cost.

JBER 2 Pack Acoustic Isolation Pads, Studio Monitor Speaker Isolation Foam Pads, High Density Acoustic Foam Suitable for 3-4.5 Inch Speakers for Sound Improvement Prevent Vibrations (8 * 6.3 * 1.4")
【DIMENSIONS】8*6.3*1.4 inches (W x D x H) with a density of 50kg/m^3 acoustic foam. With high-density foam, JBER's...
As an affiliate, we earn on qualifying purchases.
As an affiliate, we earn on qualifying purchases.
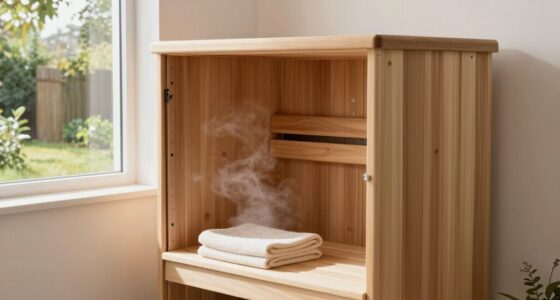
The 'Rig in the Closet' Setup — How to Keep Cool Without Cooking Your Hardware
Placing a high-power, heat-generating machine in a closet sounds perfect for noise reduction, but it’s a trap. Sealed spaces trap heat, which can cook your rig. Even a modest 600W GPU can raise the temperature by 10-15°C in a small, sealed room [2]. Overheating can cause thermal throttling, reduce hardware lifespan, or even shut down your system unexpectedly, defeating the purpose of a quiet setup.
To make it work:
- Install active ventilation — exhaust fans or ducted airflow are best. These systems draw in cool air and expel hot air, maintaining a stable temperature without noise compromise.
- Use a soundproof cabinet with built-in cooling if silence is critical. These enclosures are designed to absorb noise while allowing airflow through specialized vents or fans.
- Ensure cool air can enter—passive vents or a small fan prevent overheating. Proper airflow management is a tradeoff: too much ventilation can introduce noise, so choose quiet fans or ducting solutions.
Without proper airflow, your rig will throttle down or shut off, which not only hampers performance but can also cause hardware damage over time. For more on cooling options, see this guide. Balancing noise reduction with effective cooling is essential to keep your setup both quiet and reliable.

Soundproof Room Divider with Wheels, 72 x 66 Inch Freestanding Room Partition Wall, Portable Temporary Wall, 3 Panel Acoustic Screen, Cubicle Privacy Panels for Office, Study, Classroom (Light Grey)
【Privacy & Focus Support】This room divider panel helps reduce visual interruptions and supports focused work by separating desks...
As an affiliate, we earn on qualifying purchases.
As an affiliate, we earn on qualifying purchases.
Placement Rules for Acoustic Panels and Microphones in a Small Closet
Where you place panels and your mic makes all the difference. Acoustic dampening isn’t about covering every inch—it’s about targeting reflection points that cause muddiness and echo. The first targets are usually the side walls and behind the mic, as these are the primary surfaces where sound waves reflect and create comb-filtering issues.
Use the mirror trick: sit in your usual recording position, have someone move a mirror along the wall, and mark where you see your speakers or mic in the mirror. Those spots are your reflection points. Placing absorption panels there will significantly reduce early reflections, leading to clearer recordings and a more natural sound.
Inside a closet, treat the wall behind the mic and the side walls first. For example, a vocal booth might have panels covering only 20-40% of the surfaces, focusing on these reflection points [3]. This targeted approach minimizes unnecessary treatment, preserves some of the room’s natural liveliness, and prevents over-dampening the space.

Soundproofing Door Seal Kit - Door Frame Gasket, Screw On Weather Stripping for Doors - Top & Side Door Jamb Weatherstrip Set - Aluminum Exterior Door Seal - 84 x 36 (Aluminum, Medium-Duty)
Acoustic Insulation That Also Stops Drafts - The Marvel Mute aluminum door seal kit blocks noise and drafts...
As an affiliate, we earn on qualifying purchases.
As an affiliate, we earn on qualifying purchases.
Choosing Between Absorption, Barriers, and Bass Traps
Acoustic treatment comes in three main forms: absorption, barriers, and bass traps. Each addresses different aspects of sound control, and understanding their roles helps optimize your small space.
Absorption panels and foam reduce echoes and flutter echoes inside the space by converting sound energy into heat. Barriers like heavy curtains, blankets, or soundproof doors block sound from leaking out, which is crucial if you’re recording in a shared space or want to prevent noise from disturbing others. Bass traps absorb low-frequency energy that tends to accumulate in corners, helping to prevent boomy, muddy sound that can obscure your recordings.
In a closet studio, start with absorption at reflection points—covering the side walls and behind the mic—then add barriers if you notice sound leaks. Consider bass traps if you detect low-end buildup or uneven frequency response. For example, a small closet with strong reflections might need 30-40% coverage with foam and a thick blanket over the door. The tradeoff is that over-treating can make the space sound unnatural; balance is key to maintaining a natural yet controlled sound environment here.
How Much Coverage Do You Really Need? The Real Deal
Most guides suggest covering 20-40% of the room’s surface area for decent sound control. But in a tiny closet, the effectiveness of coverage depends on the specific problem—echo, low-frequency buildup, or sound leakage—and how well the treatment is targeted.
For example, if you’re recording vocals, treating the side walls and behind the mic with at least 20% coverage can greatly improve clarity. If you notice lingering echo or low-end boom, add bass traps in the corners and more panels on reflective surfaces. The goal is to strike a balance: too little treatment may leave your sound muddy, while too much can deaden the space and make it sound unnatural.
In a very reflective or furnace-like closet, nearly full coverage—up to 70%—may be necessary to tame reverberations. The key is to start with critical reflection points and adapt based on listening tests and measurements.
Vibration Control: The Hidden Key to Silence
Noise isn’t just airborne; structure-borne noise travels through building materials like the floor, desk, and stand. These vibrations can produce low-frequency hums that are difficult to block with traditional soundproofing methods. If your rig vibrates against surfaces, those vibrations can transfer into the structure, radiating as sound and creating a persistent hum.
Simple fixes include rubber feet or pads on your rig, isolating mounts, or decoupling your equipment from the desk with specialized stands. These methods prevent low-frequency vibrations from transferring into the building structure, effectively reducing the hum at its source. For example, placing your tower on rubber pads can cut low-frequency vibrations by up to 80%, significantly reducing the perceived noise in adjacent rooms [5]. This approach is especially important in small, enclosed spaces where vibrations are more easily transmitted and amplified.
Understanding the importance of decoupling and vibration isolation helps you address a common but often overlooked source of noise, leading to a cleaner, quieter environment.
Practical Tips for a Quiet, Functional Closet Studio
Set up your closet with a few practical steps:
- Seal cracks and gaps with weatherstripping or acoustic sealant. This prevents sound leaks and echoes bouncing around.
- Add thick moving blankets or rugs over walls and door openings. These soft materials absorb reflections and reduce sound transmission.
- Use reflection filters behind your mic to reduce early reflections, which cause comb-filtering and muddiness.
- Place foam panels at reflection points—use the mirror trick to identify them. Proper placement maximizes absorption efficiency.
- Incorporate bass traps if you notice booming lows or uneven low-frequency response. These traps absorb low-end energy that tends to accumulate in small spaces.
And don’t forget airflow. Ventilation fans or ducting keep your rig cool and silent, preventing heat buildup that can cause thermal throttling or hardware damage. Quiet, efficient cooling ensures your setup remains stable and noise-free over long sessions.
How to Prevent Echo Without Making Your Closet Sound Dead
Achieving a natural, balanced sound in a small, treated space is about managing reflections without creating a dead, boxy environment. Over-treatment can dull the sound, making recordings sound unnatural and lifeless. The key is to target reflection points while leaving some surfaces untreated to retain liveliness.
In a small closet, use a combination of absorption on the walls and soft furnishings like blankets, rugs, and furniture. These scatter and diffuse reflections, preventing flutter echoes without overly deadening the room. For example, treat the side walls and behind the mic, but leave some ceiling and corner areas untreated, or cover them with diffuse materials. Adding a soft rug on the floor helps absorb reflections from below, maintaining warmth and naturalness. The goal is to reduce harsh echoes while preserving the room’s character, resulting in recordings that sound clear and lively rather than sterile.
Frequently Asked Questions
Is it better to treat inside the closet or block sound leaks from outside?
Both matter. Use acoustic panels inside to control reflections and absorption, and add barriers like blankets or door seals to prevent sound from leaking out. Combining these approaches gives you the best results.How do I know if I need bass traps in my closet booth?
If you notice boomy lows or a muddy sound, bass traps can help. Place them in the corners where low frequencies tend to build up. For small closets, even a few thick panels can make a difference.Can I use regular furniture or blankets for soundproofing?
Yes, heavy blankets, rugs, and furniture can absorb reflections and reduce echo, but they won’t block sound transmission. For soundproofing, add barriers like sealed doors or specialized panels.How much acoustic treatment is enough for a closet studio?
Aim for about 20-40% coverage of reflective surfaces, focusing on the most problematic reflection points. Adjust based on how much echo or low-end boom you notice.Will a closet be too small for good recordings?
Not necessarily. Small spaces naturally limit room sound, making them ideal for vocal recordings. Just treat reflection points and add soft materials to keep the sound natural and clear.Conclusion
Transforming a tiny closet into a quiet, professional-sounding space is about smart placement and strategic treatment. Moving the rig out of your immediate workspace can save you hours of hassle and money.
Add some absorption, block sound leaks, and keep the heat flowing. Then, enjoy a space where your voice sounds clear, and your noise doesn’t spill into the rest of the house. It’s a small change with a huge payoff—quiet, focused work, whenever you need it.