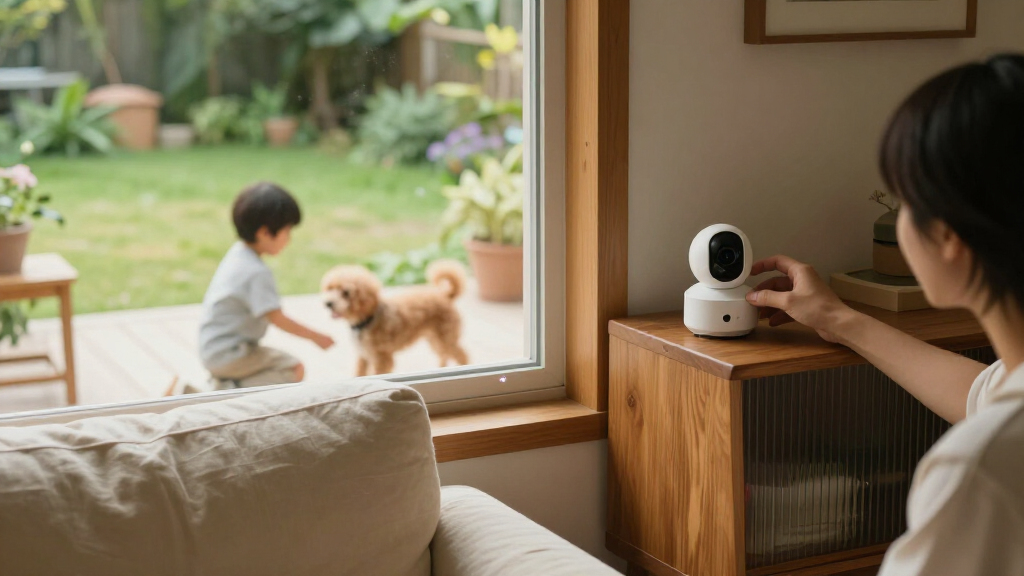
Set up smart home security cameras to monitor an entryway, room, or outdoor area, receive motion alerts, and review recordings. This guide is for beginners installing a consumer Wi-Fi camera with its companion phone app. Plan for about 45–90 minutes per camera, including account setup, placement, connection, and testing.

Get everyday essentials delivered free — and shop member deals
- Fast, free delivery on millions of items
- Access to Prime Big Deal Days deals on October 6–7
- Prime Video, Amazon Music and more included

Blink Outdoor 4 Wireless Smart Security Camera System, 3 Cameras
- ✔ Camera count: 3
- ✔ Video resolution: 1080p HD
- ✔ Night vision: Infrared
Blink Outdoor 4 Wireless Security Camera System, 5 Cameras
- ✔ Camera count: 5
- ✔ Video resolution: 1080p HD
- ✔ Field of view: 143° diagonal
Blink Outdoor 4 Wireless Security Camera System, 2 Cameras
- ✔ Camera count: 2
- ✔ Video resolution: 1080p HD
- ✔ Night vision: Infrared
Difficulty: Beginner | Time: 45–90 minutes per camera
What You’ll Need
Tools & Materials:
- Smartphone or tablet with the camera maker’s app installed
- Smart home camera, power adapter, and included mounting hardware
- Wi-Fi network name and password; many cameras require 2.4 GHz Wi-Fi
- Drill and screwdriver for permanent mounting, if needed
- Ladder for high mounting locations, if needed
Knowledge:
- Basic use of a smartphone app
- Ability to connect a phone to Wi-Fi and enter a network password
Check the camera’s Wi-Fi, power, and weather-resistance requirements before choosing a location. If you plan to record video, check the camera’s storage options, subscription terms, and local privacy rules. Do not point a camera into a neighbor’s private space.
Blink Outdoor 4 Wireless Smart Security Camera System, 3 Cameras
The three-camera bundle earns our top spot because it sits between the smallest and largest packages without making coverage the only priority. We can place cameras at a few distinct locations—such as an entryway, garage approach and backyard—while avoiding the commitment to five units. Compared with the two-camera kit, it gives us another viewpoint; compared with the five-camera pack, it keeps the setup more compact.Its core feature set is consistent with the other Outdoor 4 bundles: 1080p HD live view, infrared night vision, two-way audio and enhanced motion detection. The stated battery life of up to two years can make wireless placement more convenient where running power is awkward, though actual battery life depends on use. Alexa compatibility is useful for a household already using supported devices.The tradeoff is that this is not a self-contained local recording package. The included Sync Module Core has no local storage, and person detection requires an optional subscription; cloud storage is also subscription-based. Buyers who want recordings saved locally should check storage needs before choosing. For a typical home that wants a few wireless camera locations and accepts those limits, this bundle is the most balanced of the three.
Pros:
- Three cameras balance broader coverage with a manageable system size.
- 1080p live view with infrared night vision.
- Two-way audio and enhanced motion detection.
- Batteries are rated for up to two years of use, and the system works with Alexa.
Cons:
- Sync Module Core does not include local storage.
- Person detection and cloud storage require an optional subscription.
Best for: Households that want three wireless camera locations and already use or plan to use Alexa-compatible devices.
Not ideal for: Buyers who require local recording with the included module, or who need five camera viewpoints in one bundle.
Bottom line: We recommend the three-camera bundle as the most flexible starting point for buyers who want broader coverage without stepping up to five cameras.
“We recommend the three-camera bundle as the most flexible starting point for buyers who want broader coverage without stepping up to five cameras.”
Blink Outdoor 4 Wireless Security Camera System, 5 Cameras
When the priority is covering several parts of a property, the five-camera pack is the most direct choice in this lineup. It is better suited than the three-camera system to a home with multiple doors, a detached garage or several outdoor approaches. The extra viewpoints can reduce the need to add cameras immediately, but they also mean more devices to position, connect and maintain.The cameras share the same 1080p video, infrared night vision and two-way audio found in the smaller bundles. The package lists a 143-degree diagonal field of view and up to 30 fps, details that help describe how each camera captures its scene. Alexa and Blink Sync Module compatibility keep it within the same smart home family as the other options.Coverage comes with upkeep: this kit includes ten non-rechargeable lithium AA batteries, two per camera, and its battery-life rating is up to two years. More cameras mean more batteries to replace eventually. Like the other bundles, its Sync Module Core does not include local storage; cloud storage and person detection require an optional subscription. Choose it when five placements are genuinely useful, rather than simply because a larger package sounds more complete.
Pros:
- Five cameras and five mounting kits support broader coverage.
- 1080p live view, infrared night vision and two-way audio.
- 143-degree diagonal field of view and up to 30 fps are specified.
- Works with Alexa-enabled devices and Blink Sync Modules.
Cons:
- Sync Module Core does not include local storage.
- Cloud storage and person detection require an optional subscription.
- The included lithium batteries are non-rechargeable, and five cameras mean more to maintain.
Best for: Households that need several outdoor camera viewpoints across entrances, paths, a garage or other separate areas.
Not ideal for: People monitoring only one or two locations, or buyers who want rechargeable batteries or local storage in the included module.
Bottom line: We would choose this pack over the three-camera option when five distinct placements serve a real coverage need and we accept the added battery upkeep.
“We would choose this pack over the three-camera option when five distinct placements serve a real coverage need and we accept the added battery upkeep.”
Blink Outdoor 4 Wireless Security Camera System, 2 Cameras
The two-camera kit is the simplest entry into this lineup: it covers two locations without requiring us to plan a larger multi-camera arrangement from day one. For a small home, apartment entrance and balcony, or front and back doors, that may be enough. Compared with the three-camera bundle, it offers less flexibility if we later want to add another viewpoint; compared with the five-camera pack, it is easier to keep focused on a couple of priority areas.It retains the same essentials as its siblings, including 1080p HD video, infrared night vision, two-way talk and enhanced motion detection. The included batteries are rated for up to two years, and Alexa compatibility can make the cameras a natural fit in an existing Alexa-oriented home. Mounting kits, a USB-C cable and a power adapter are included.The smaller bundle does not solve the range of shared limitations. Its Sync Module Core offers no local storage, and person detection needs an optional subscription; additional storage accessories are sold separately. If we expect to monitor three or more areas soon, the three-camera kit is a more convenient starting choice. But for a buyer who wants to cover two clear priorities and keep the system limited, this is the most focused option.
Pros:
- Two cameras suit a compact setup focused on priority areas.
- 1080p video with infrared night vision.
- Two-way talk and enhanced motion detection.
- Includes mounting kits and batteries rated for up to two years.
Cons:
- Sync Module Core does not include local storage.
- Person detection requires an optional subscription, and additional storage accessories are sold separately.
Best for: First-time camera buyers or smaller households with two priority locations and Alexa-compatible devices.
Not ideal for: Homes that need three or more camera positions now, or buyers who require included local storage and subscription-free person detection.
Bottom line: We recommend the two-camera kit for a focused first setup, while buyers who anticipate wider coverage should start with the three-camera bundle.
“We recommend the two-camera kit for a focused first setup, while buyers who anticipate wider coverage should start with the three-camera bundle.”
As an Amazon Associate we earn from qualifying purchases.
Before You Start
Protect your account: Use a unique password for the camera account and enable two-step verification if the app offers it. Keep the camera and app firmware up to date. For outdoor installations, follow the product’s weather and power instructions; do not use an indoor-rated camera outdoors.
Choose a location near reliable Wi-Fi and a suitable power source. Test the wireless signal at the intended spot before drilling. Avoid aiming the lens directly at bright windows or strong lights, which can make footage hard to see.
Step-by-Step Instructions
Step 1: Choose the camera location
Stand where you expect the camera to go and check what it can see. Cover the approach or area you want to monitor while avoiding private spaces, direct glare, and objects that block the view. For an entryway, include the door and the area where a person would approach it.
Tip:For a battery camera, confirm that you can reach the device later for charging. For a wired camera, check that the outlet and cable route are safe and practical.
Check: The intended area is visible from the mounting point, and the camera can receive power and a usable Wi-Fi signal there.
Step 2: Install the camera app and create an account
Install the official app listed in the camera’s setup instructions. Create or sign in to an account, using a unique password. Turn on two-step verification if available, and grant only the phone permissions needed for setup and alerts.
Tip:Download the app from your phone’s official app store. Confirm the app name and publisher against the product instructions.
Check: You can sign in to the camera app and see its option to add or set up a device.
Step 3: Power on and add the camera
Connect the camera to its specified power source, then open the app and select the option to add a device. Follow the on-screen pairing instructions. The app may ask you to scan a QR code on the camera or enter a setup code. Keep your phone close to the camera during pairing.
Tip:Do not reset the camera unless pairing instructions call for it. A reset can erase existing settings.
Check: The app recognizes the camera and advances to network setup or displays the device in your account.
Step 4: Connect the camera to Wi-Fi
Select your home Wi-Fi network in the app and enter its password carefully. If the app asks you to connect your phone to a temporary camera network, do so and return to the app when prompted. Wait for the camera to finish connecting before moving it.
Tip:Some models work only on 2.4 GHz Wi-Fi. If setup fails on a combined network, check the camera instructions and router settings for a compatible band.
Check: The app reports that the camera is online and shows a live view or device controls.
Step 5: Update the camera and set account security
Open the camera’s device settings and check for a firmware update. Install it while the camera has stable power and Wi-Fi. Review account security settings, set a unique camera account password, and enable two-step verification when available.
Tip:Leave the camera powered on during an update. Interrupting power or Wi-Fi can prevent the update from finishing.
Check: The app shows the current firmware status, and you can confirm two-step verification is enabled if the feature is offered.
Step 6: Set the view and motion detection
Place the camera temporarily at the chosen location and open its live view. Adjust its angle so the target area is in frame. In the app, enable motion detection and choose a detection zone if available. Set sensitivity so normal movement in the target area triggers detection without capturing every passing car, tree branch, or change in light.
Tip:Start with moderate sensitivity, then review test alerts and adjust it. Person or package detection may require a compatible model or paid plan.
Check: The live view covers the area you want, and motion detection is enabled with a zone or sensitivity setting that matches the location.
Step 7: Choose recording and notification settings
In the app, choose whether recordings go to a memory card, a home hub, or cloud storage. Review any subscription requirements and recording-retention limits before relying on a feature. Enable the notifications you need, such as person detection or motion, and choose quiet hours if supported.
Tip:Phone notification permissions must also be enabled in the phone’s system settings. Avoid turning on every alert type until you know which ones are useful.
Check: The app displays the selected recording option, and the phone is permitted to show the alerts you want.
Step 8: Mount the camera and test it
Use the included mounting hardware and follow the manufacturer’s instructions. For a permanent mount, mark the holes, check for hidden wires or pipes before drilling, then fasten the bracket and attach the camera. Open the live view again, walk through the detection area, and check that an alert arrives and that a recording appears where expected.
Tip:For outdoor mounting, seal or protect cable openings as directed by the manufacturer. Do not place a ladder on uneven ground or overreach while using it.
Check: The camera stays in position, the live feed is clear, a test movement triggers the expected alert, and the clip can be played back.
Common Mistakes to Avoid
- Mounting before checking the Wi-Fi signal. — Test the camera at the intended location during setup. Move it closer to the router or improve coverage if the connection is unstable.
- Choosing a view that includes glare or misses the approach. — Check the live view at different times of day, adjust the angle, and keep bright windows or lights out of the direct frame when possible.
- Using a weak or reused account password. — Set a unique password and enable two-step verification to reduce the chance of unauthorized account access.
- Setting motion sensitivity too high or enabling every alert. — Begin with a moderate setting and a detection zone. Review test alerts, then narrow the area or lower sensitivity if irrelevant notifications continue.
Troubleshooting
Problem: The camera does not join Wi-Fi.
Solution: Confirm the password, check that the camera supports the selected Wi-Fi band, and move the camera closer to the router during setup. Restart the camera and try pairing again using the app’s instructions.
Problem: The live view is slow, blurry, or drops out.
Solution: Check the Wi-Fi signal where the camera is mounted. Reduce distance or obstacles between the camera and router, restart the router if needed, and confirm the camera firmware and app are current.
Problem: Motion alerts do not arrive.
Solution: Check that motion detection is enabled in the camera app and that the phone allows notifications for it. Review quiet hours, detection zones, and sensitivity, then walk through the monitored area to test again.
Problem: The camera detects too many events or misses movement.
Solution: Adjust the detection zone to cover the target area, then change sensitivity in small increments. Check that the lens is not aimed at moving branches, reflective surfaces, or direct sunlight.
What Success Looks Like
The camera remains online at its installed location, shows the intended area clearly, and records when a test movement occurs. The phone receives the selected alert, and you can open and play the resulting clip. Account access is protected with a unique password and, when available, two-step verification.
Next Steps
Review the camera feed and alerts for a few days. Adjust the angle, detection zone, or sensitivity if you see missed events or frequent irrelevant alerts. Check storage capacity and recording retention, install future firmware updates, and recharge or replace batteries before they run low. Review account access periodically and remove cameras or users you no longer need.
Frequently Asked Questions
Does a smart home camera need Wi-Fi?
Most consumer smart cameras need Wi-Fi for app setup, live viewing, alerts, and cloud features. Some models can record locally during an internet outage, but remote access and notifications may stop until the connection returns. Check the camera’s instructions for offline behavior.
Do I need a subscription to record video?
It depends on the model. Some cameras support local recording to a memory card or hub, while cloud recording, longer history, or advanced detection may require a subscription. Check the storage options and plan terms in the app before relying on a recording feature.
Where should I mount an outdoor camera?
Choose a point that covers the approach or entry while staying within the camera’s weather and power limits. Check the view and Wi-Fi signal before drilling, and follow the manufacturer’s instructions for mounting height, cable protection, and weather sealing.
Can I use one camera account with other household members?
Many apps let the account owner invite household members with separate logins or permissions. Use the app’s sharing feature instead of giving out the owner password, and remove access when someone no longer needs it.
Fall Picks
fall essentials
As an affiliate, we earn on qualifying purchases.